In this article, you will discover how to place your test automation in CI/CD - GitLab, in order to guarantee not only agility and constant testing after any new Merge Request, but also the quality in the delivery of new versions of the application.

Did you know you can set your test automation to run in a pipeline and execute them every time there is a new Merge Request?
Since tests are slower if run on our local machine, in the worst case, the automation might depend on a manual execution.
By creating a repository in GitLab and placing the tests in a pipeline, every time a Merge Request occurs, the tests will be executed, and we will receive feedback. All this without compromising speed and enhancing delivery quality.
What is GitLab?
GitLab is a cloud-based Git and DevOps platform that helps developers monitor, version, test, and deploy their code.
A cloud Git repository used to be the main selling point of GitLab. However, the platform has evolved beyond its simple origins. Today, GitLab offers a wide range of DevOps features such as continuous integration, security, and even application deployment tools.
For more information about Git, this article can be helpful.
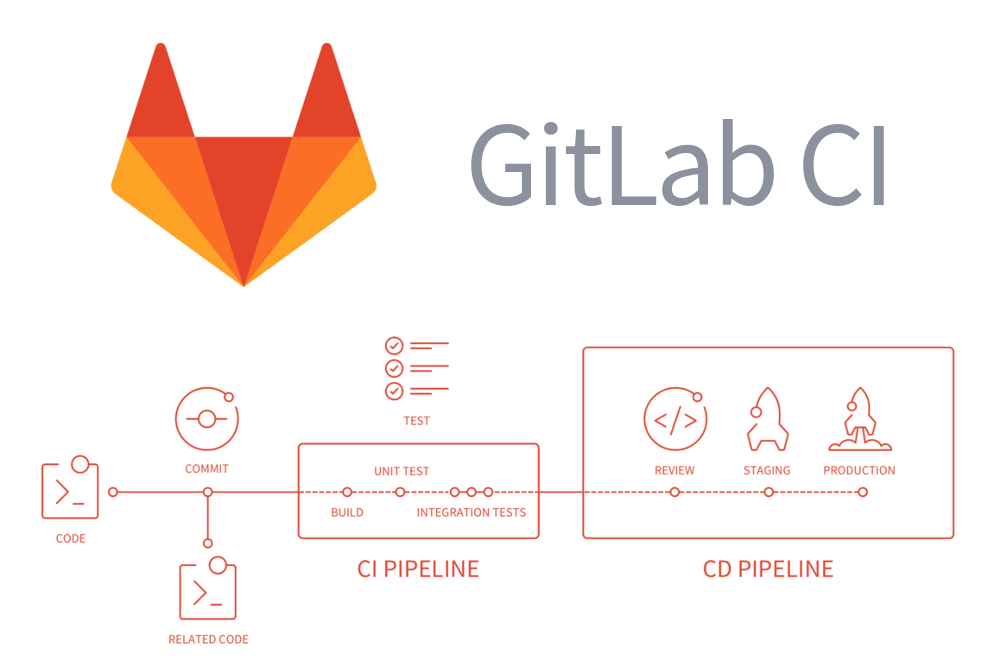
How to Create a Repository and Add it to Your GitLab Pipeline?
1. Create Your Test Automation Project in a GitLab Repository
a. Log in to GitLab, go to the option “New Project,” and click on “Create a blank project.”
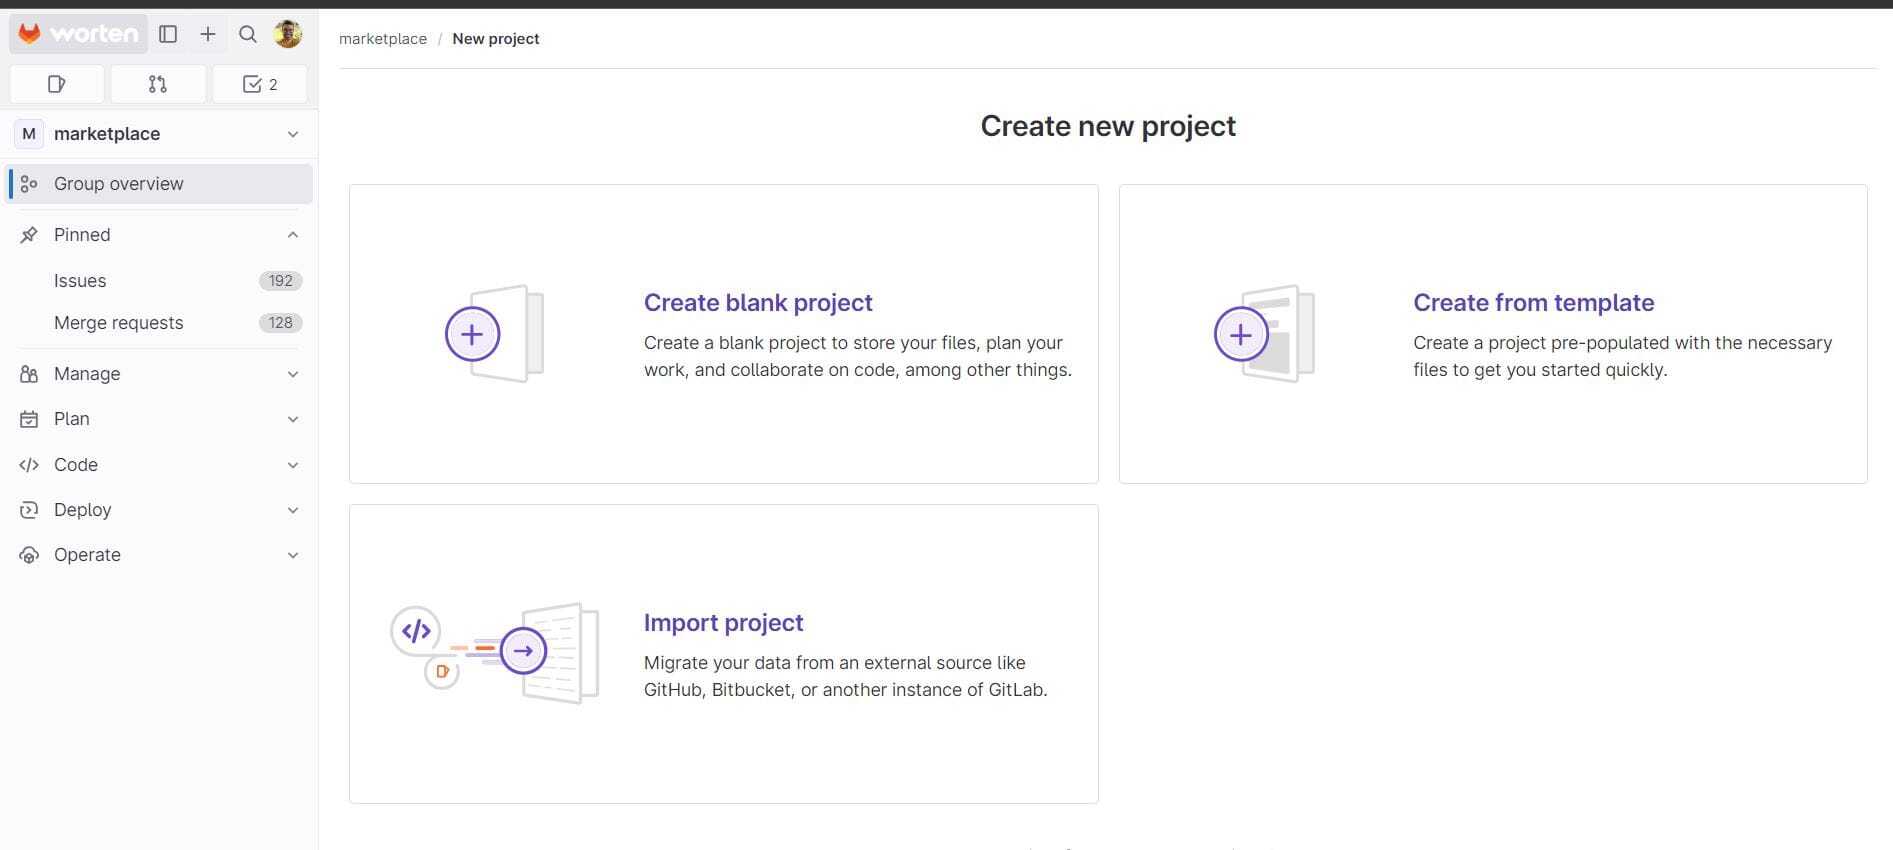
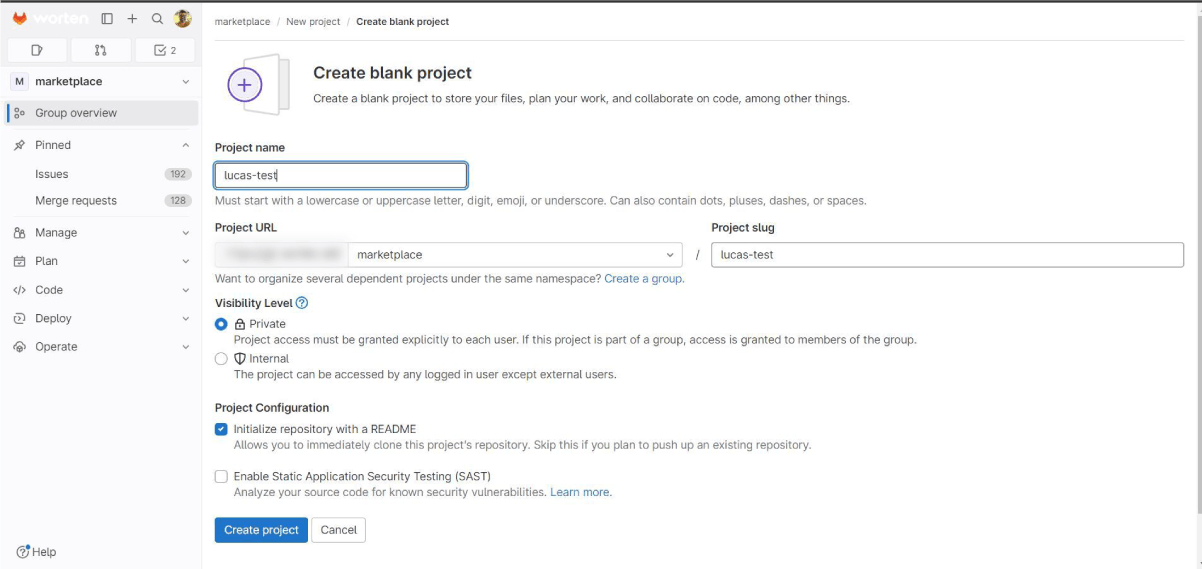
b. Fill in the name of your project and click “Create project”.
c. Your repository has been successfully created!
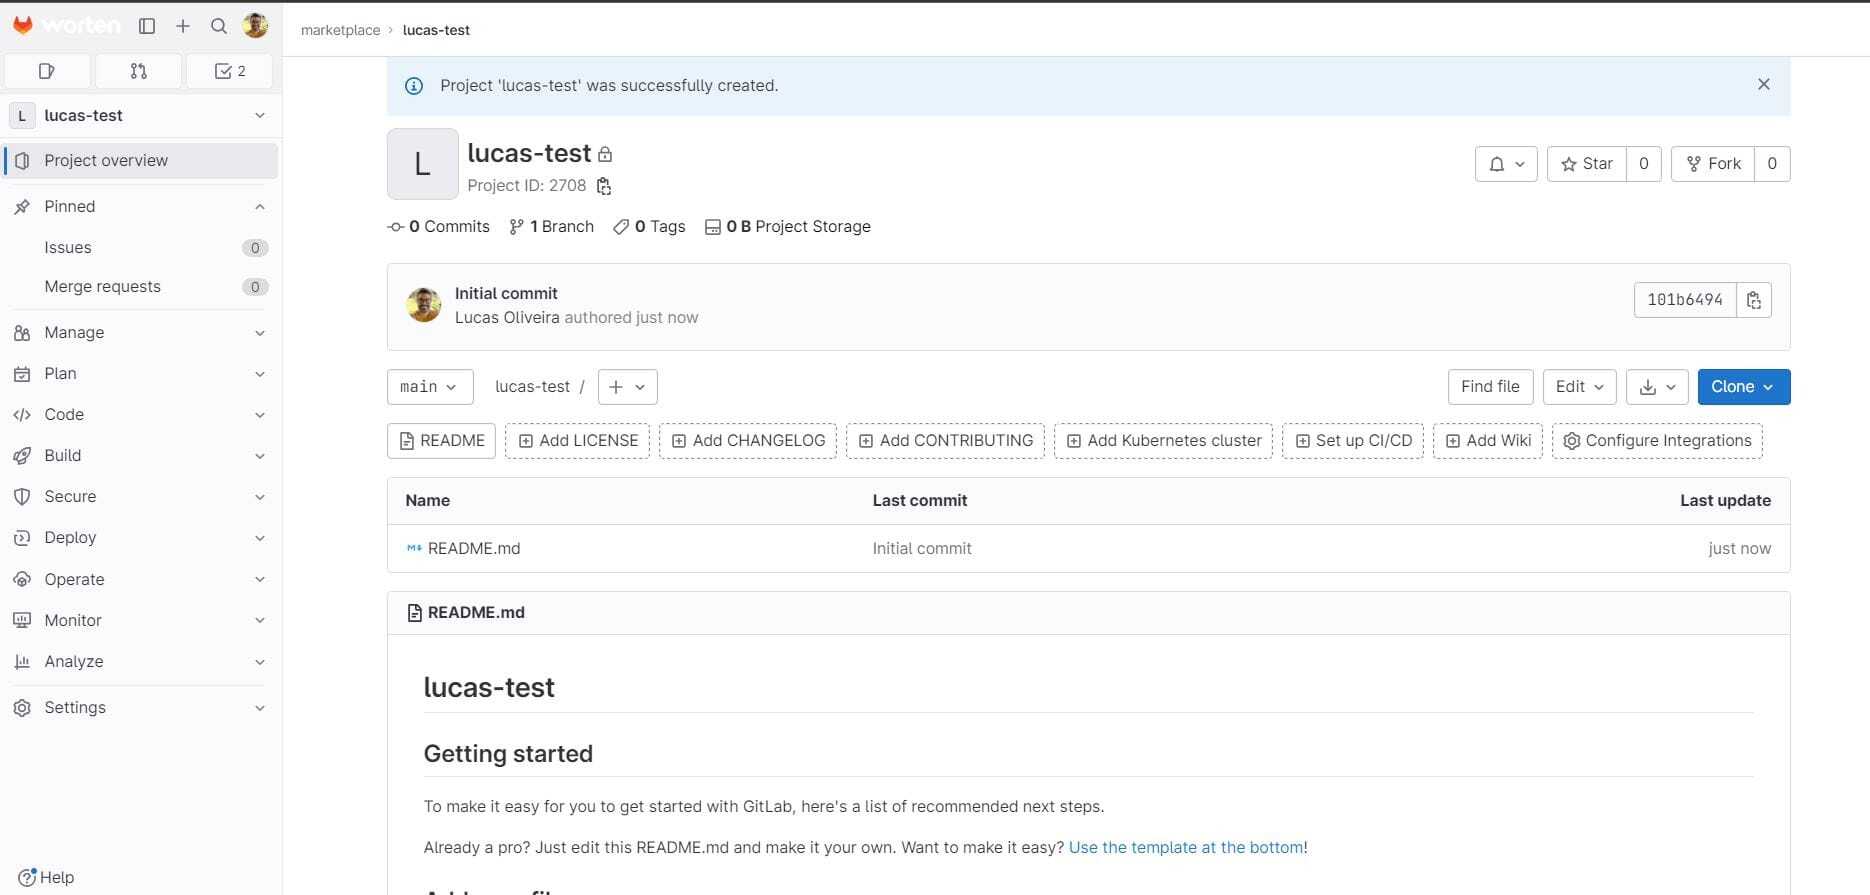
2. Clone the Repository
a. Click the blue “clone” button and then copy the HTTPS address.
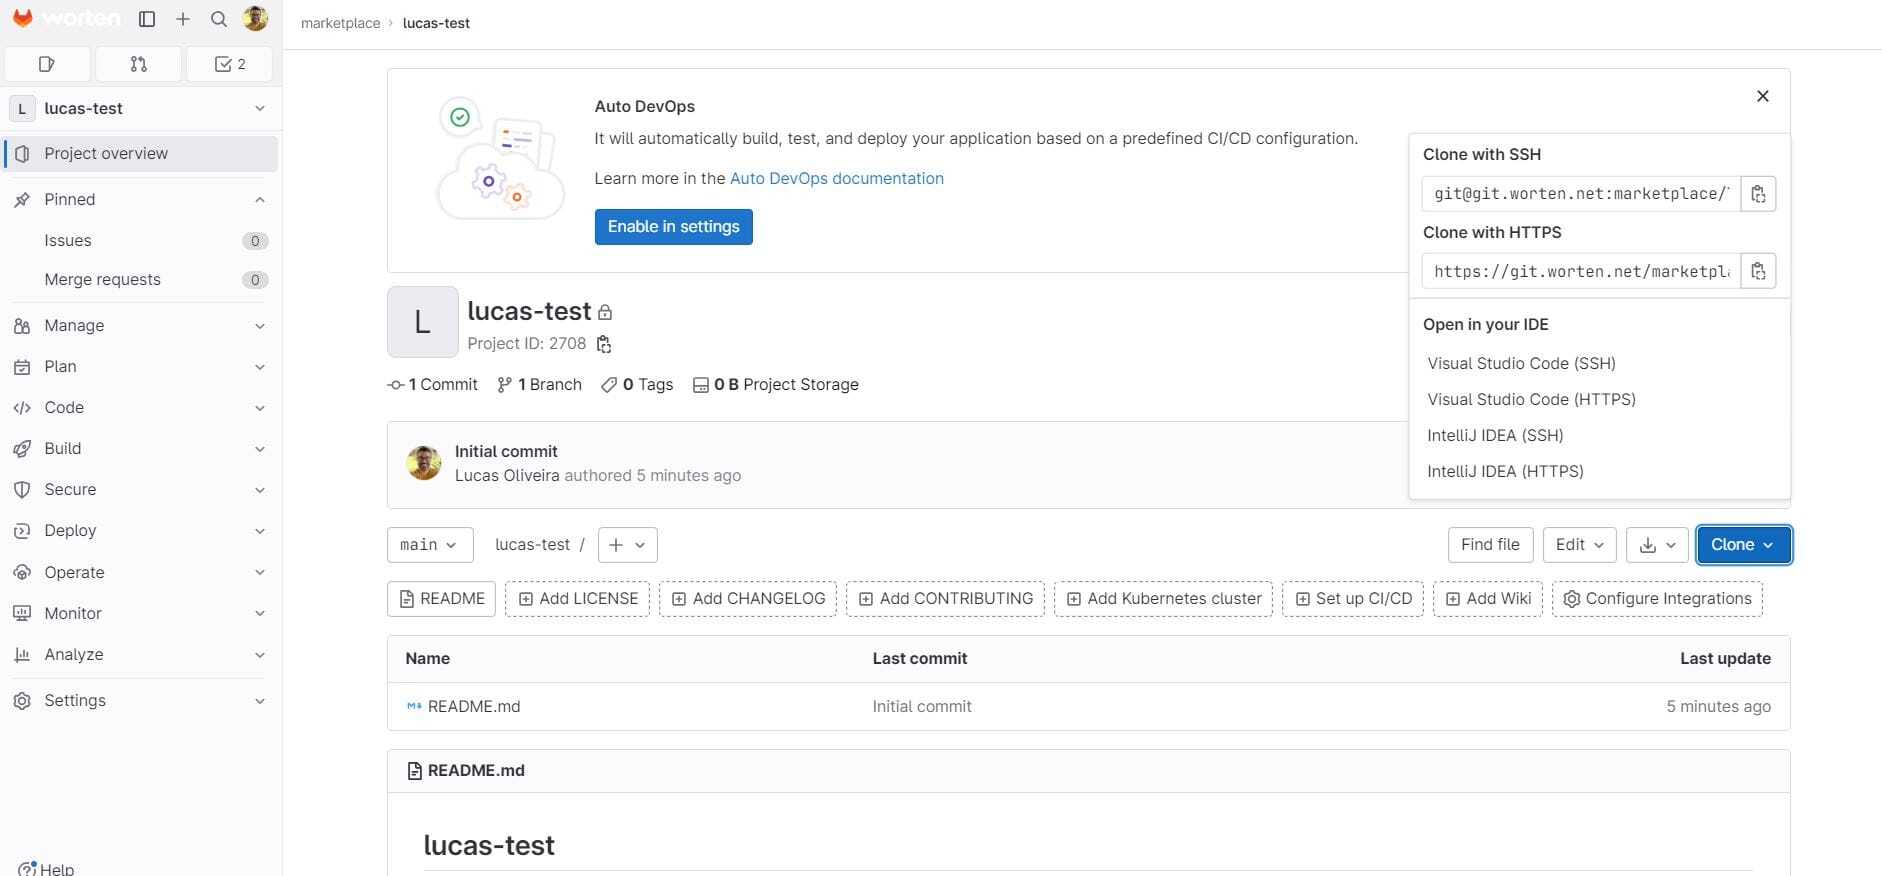
b. Go to the Command Prompt within the desired folder and clone the repository with the command: git clone followed by the copied address, as shown in the image below.
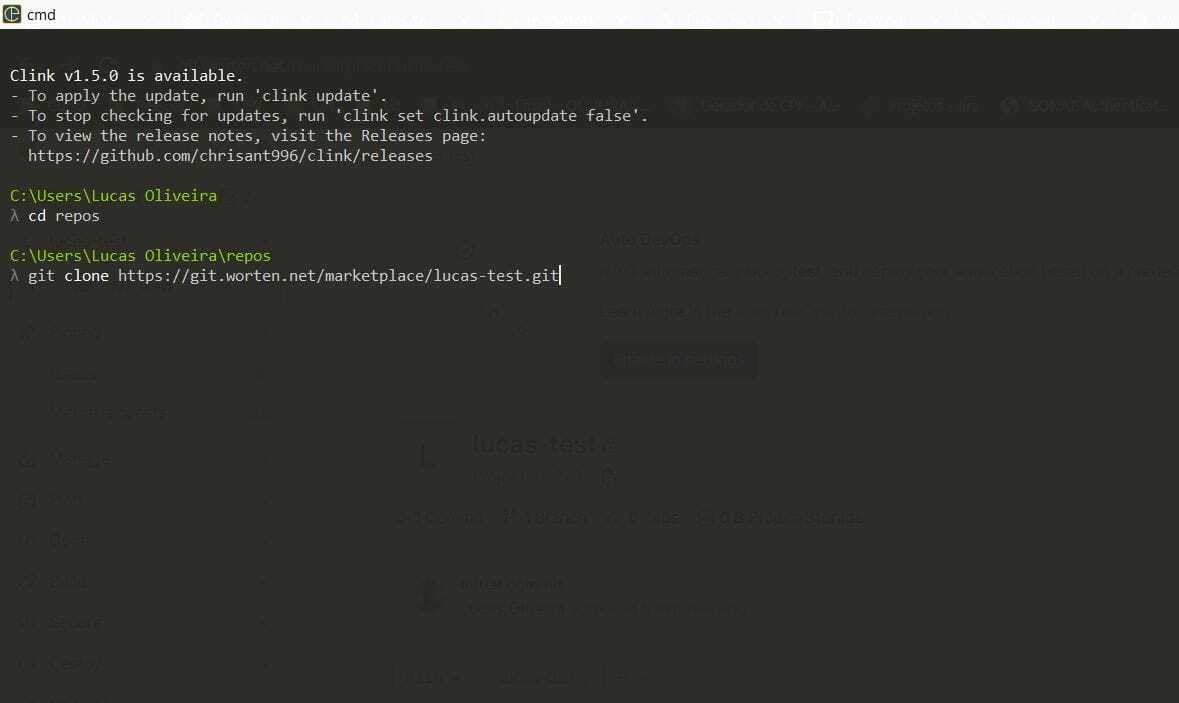
c. After running the clone, your repository will be on your local machine so you can create your test automation.
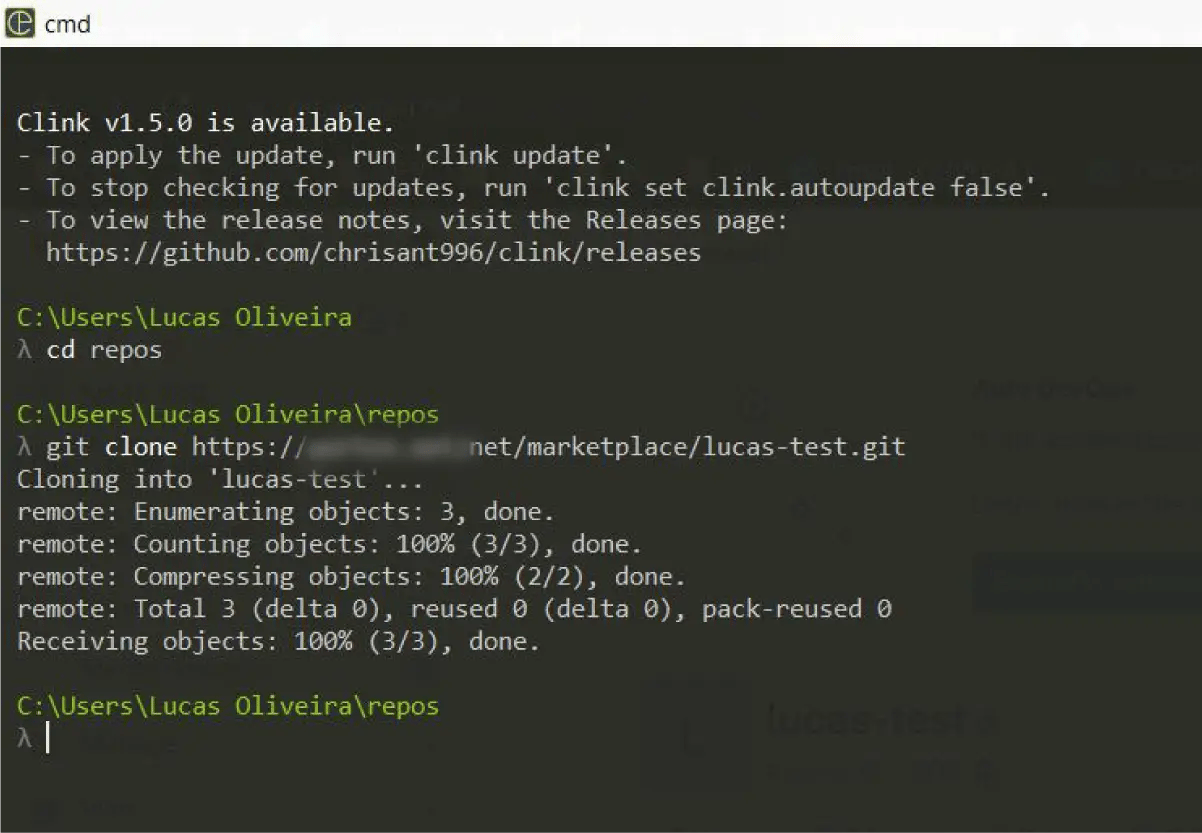
3. Push Your Code to the Repository
a. After creating your test automation, you need to push your code to the repository.
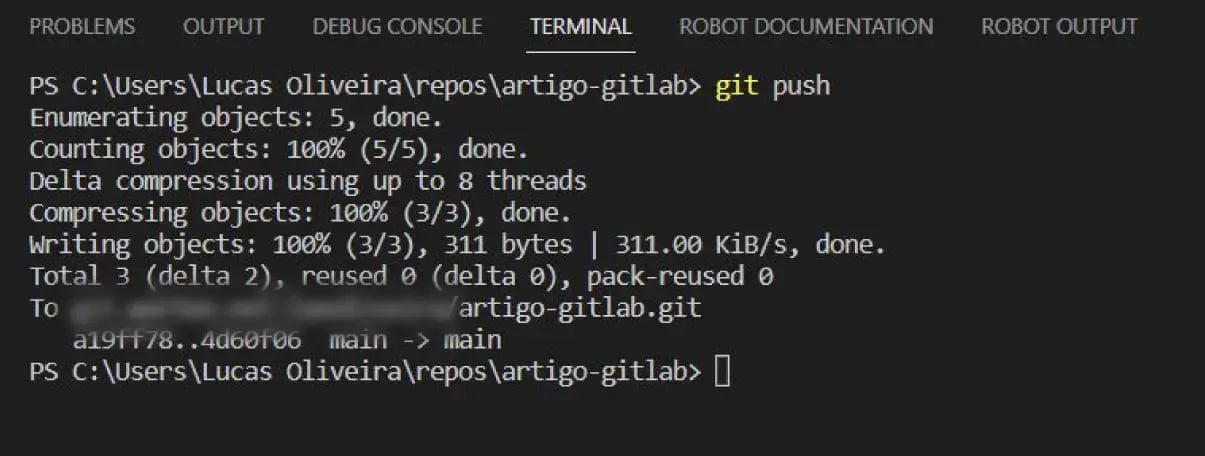
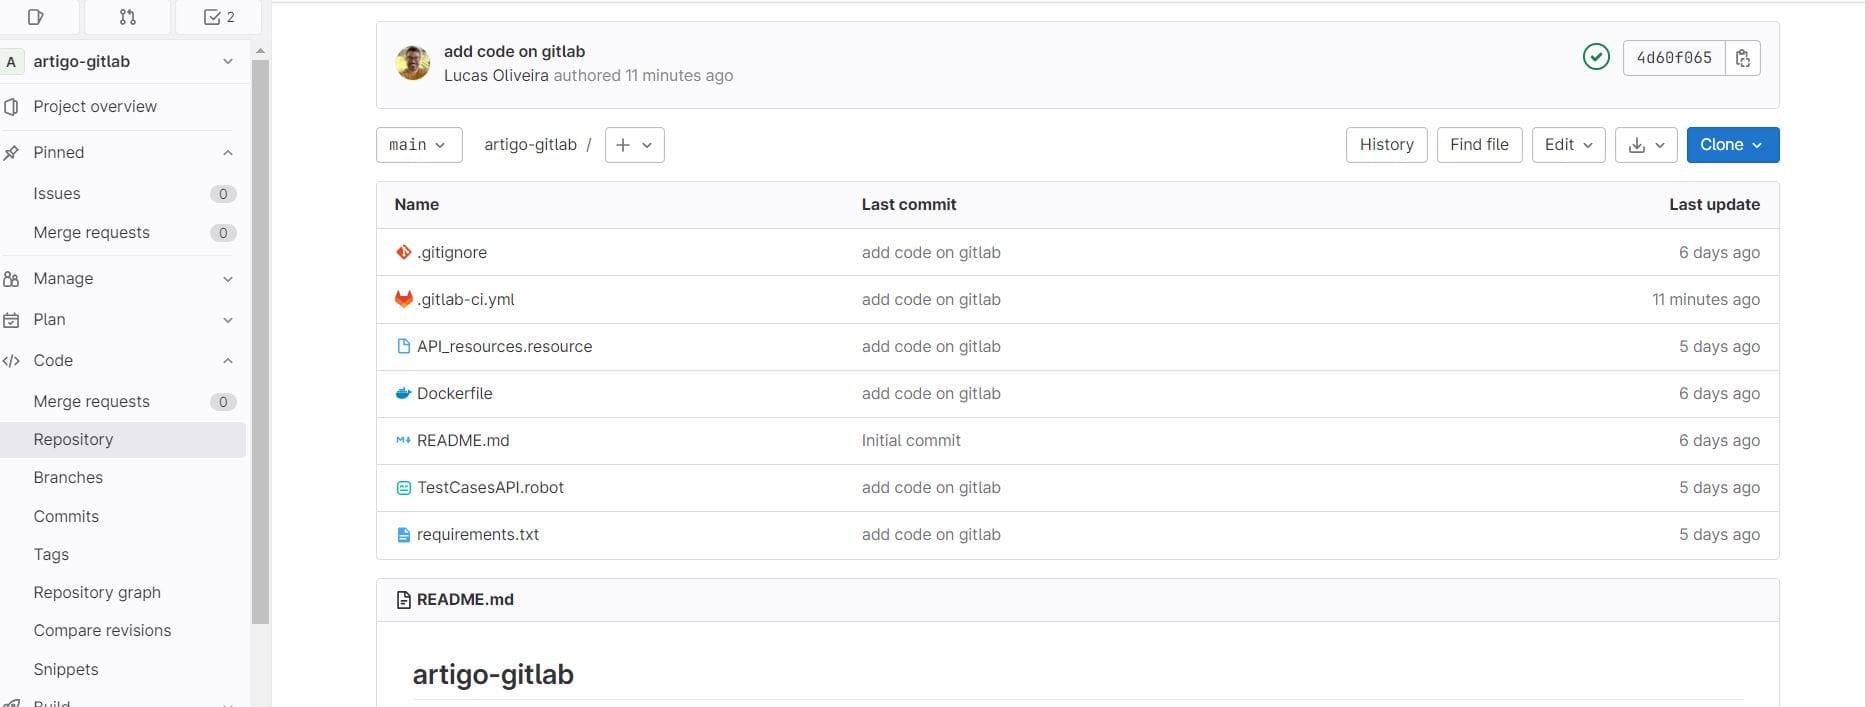
b. After the push, your repository will appear in GitLab, just like this:
4. Set up the GitLab-ci
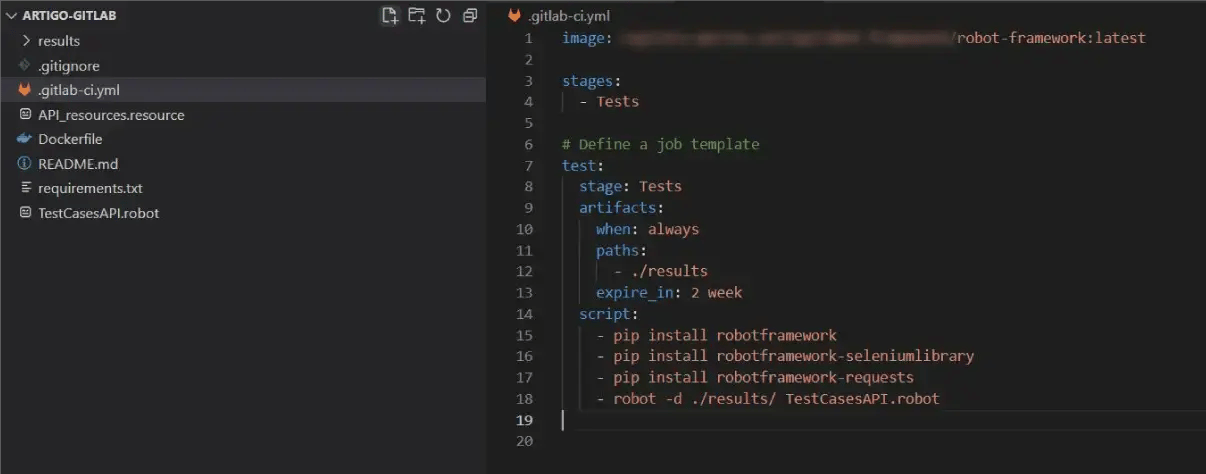
a. Create the GitLab-ci.yml file in the root of your local project, as shown in the image below:
5. Push the file to verify the pipeline execution

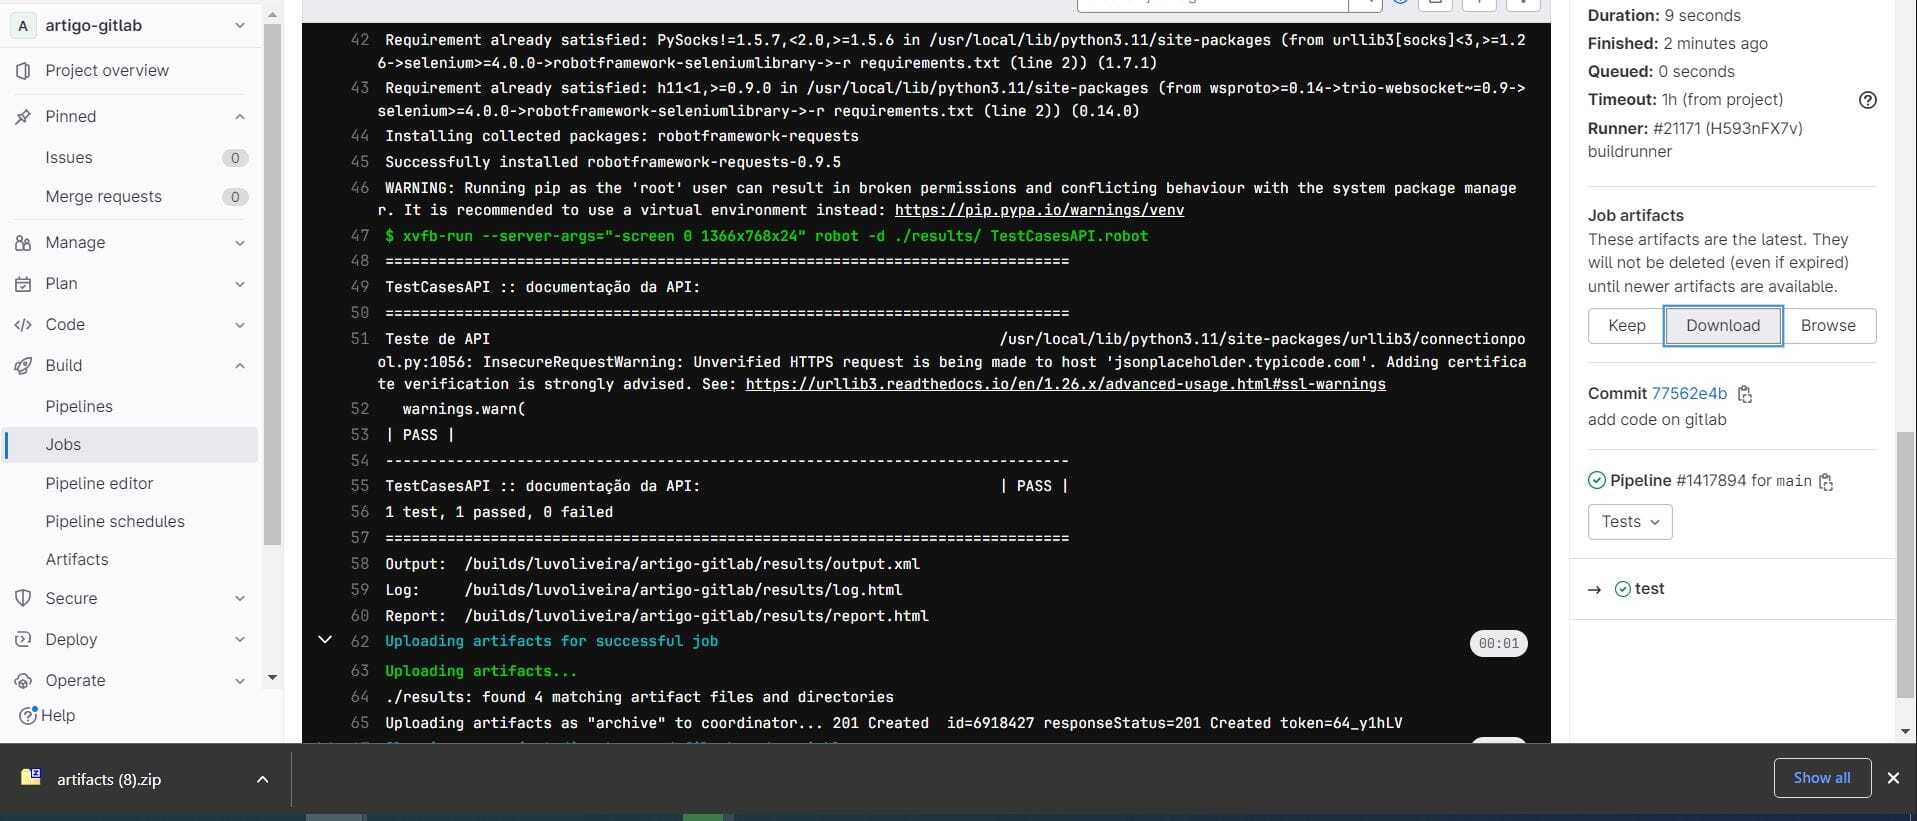
6. Verify Executions in the Console
a. Check the executions in the console.
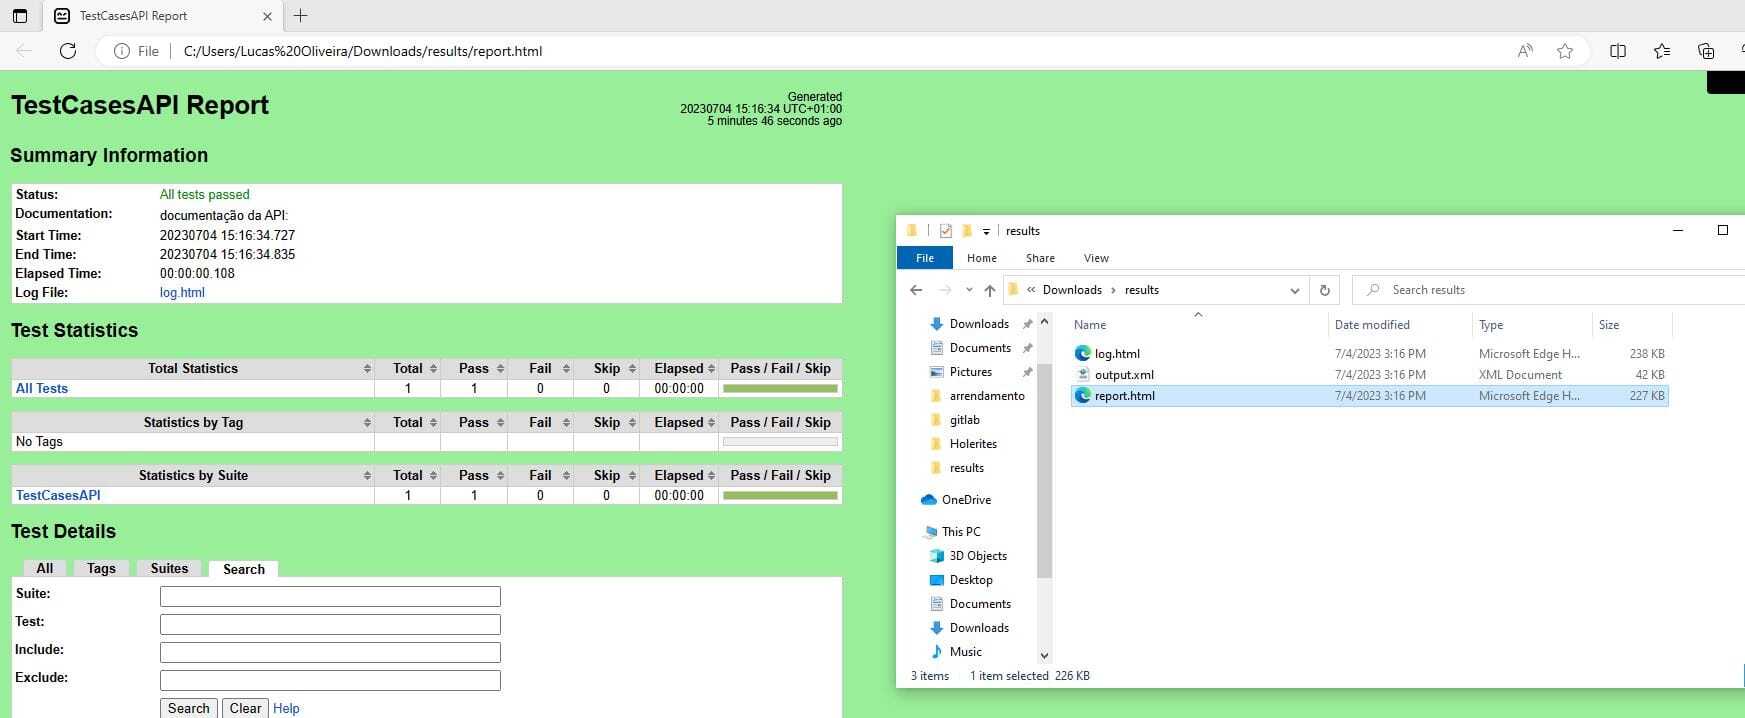
7. Download Artifacts to Get the Test Report
a. Download the artifacts to view the test reports.
How to Add Your Test Automation to CI/CD – GitLab: Final Thoughts
By following all the steps described in this article, we will have our automated tests running in the GitLab CI/CD pipeline. Thus, tests will always run after any new Merge Request, ensuring agility and constant testing, guaranteeing the quality of new application versions.
GitLab has other interesting features to explore, such as running our pipeline through another pipeline with a Downstream trigger. I strongly recommend checking out the GitLab site mentioned in the article for more knowledge.
I hope you enjoyed this guide and feel free to leave any questions in the comments.
Get In Orbit in your inbox
A monthly selection of articles and perspectives from KWAN. Choose what's relevant to you.
Related Articles
-1.png)
IT team extension in Portugal: what you ...
How IT team extension with engineers in Portugal works week to week: contract models, time zones, public holidays, time ...
Read article-1.png)
How to ship your first pull request on a...
What to change, how much to change, and what to put in the description, when you have been on the team a week and nobody...
Read article-1.png)
AI & the role of Data Engineer
How AI is changing data engineering: pipeline drafts, failure triage and quality tests shift to AI, while data definitio...
Read article